 Wisdom
Setting Up an Ubuntu Server with Three Network Interfaces
AIM OF CONFIGURATION
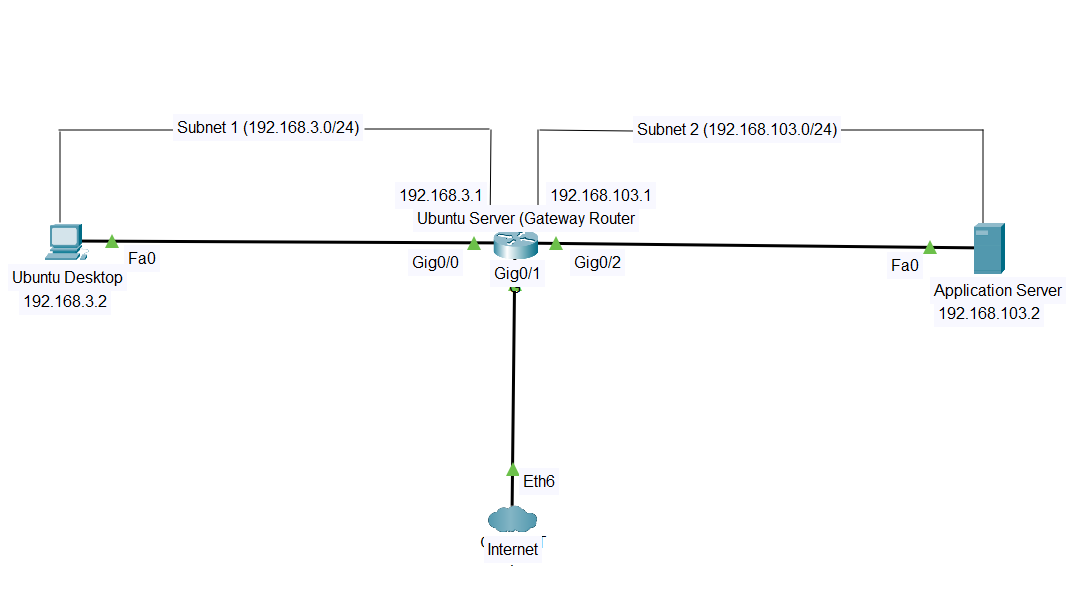
To have the Ubuntu server act as a gateway router that does the following
- Allow internal communication on two different subnets using **internal network**
- Allow external/internet communication via another interface using **NAT**
- Allow proper functioning of domain name resolution.
STEPS
- Download and Install an Ubuntu Server VM
-
Configure the Ubuntu Server as a gateway router.
NOTE: We need our gateway server to have three interfaces to be able to achieve our goal.
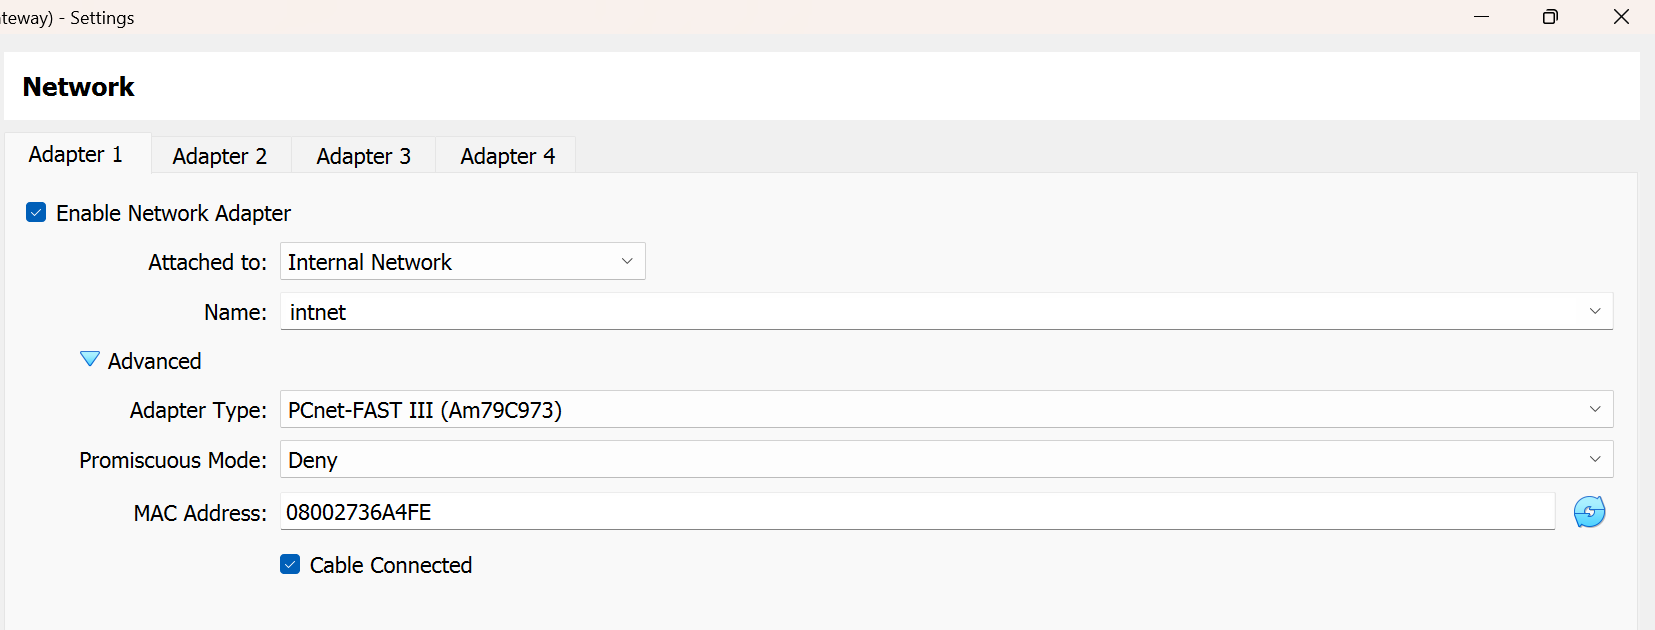
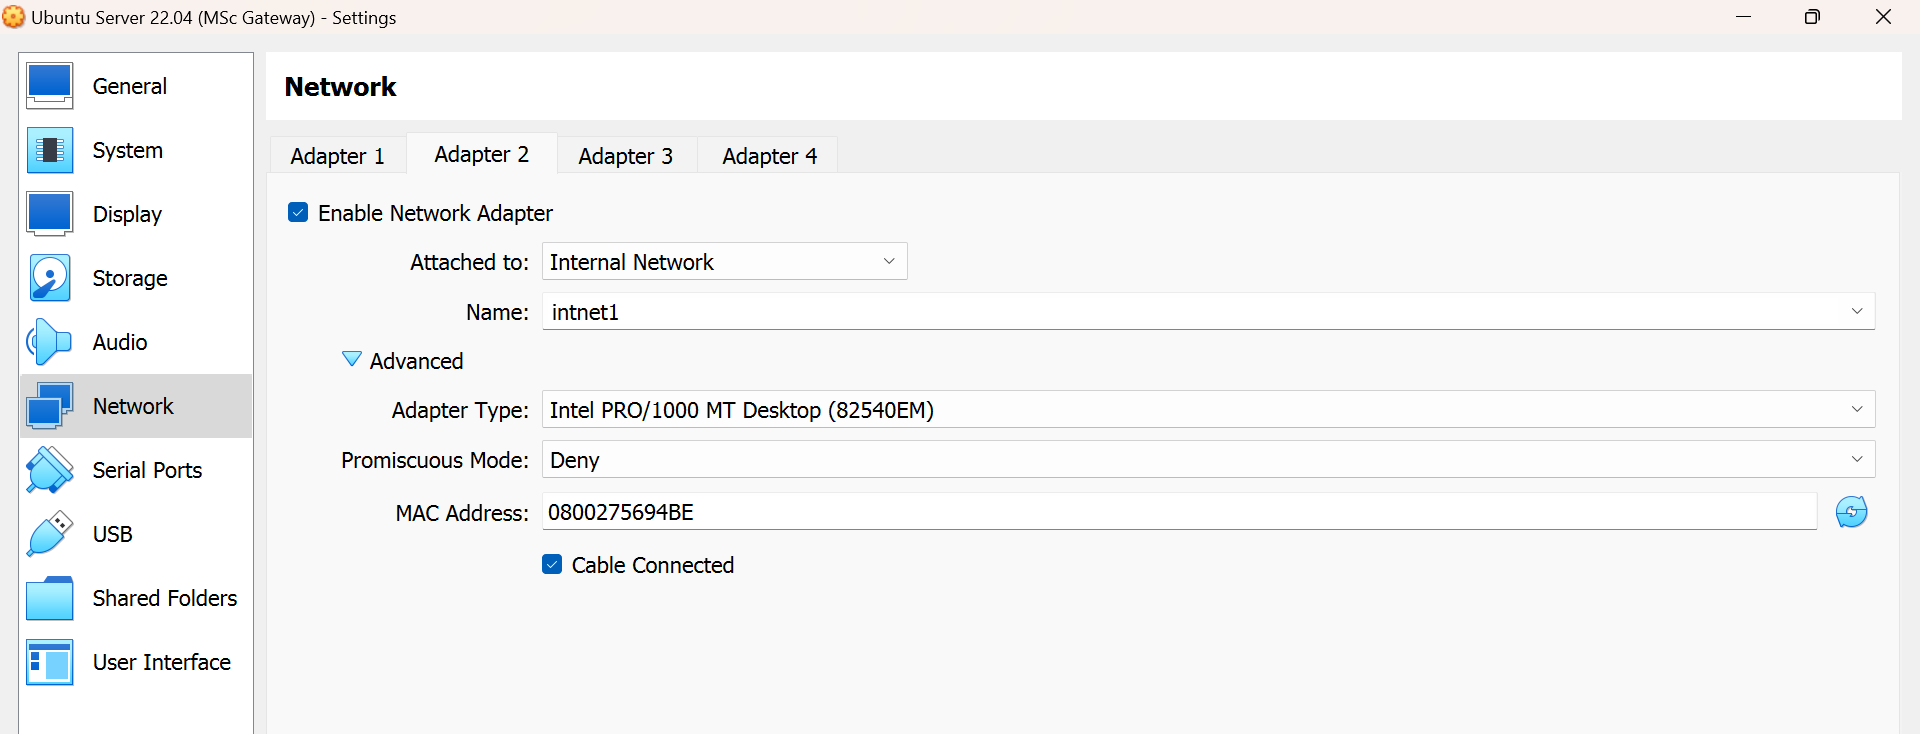
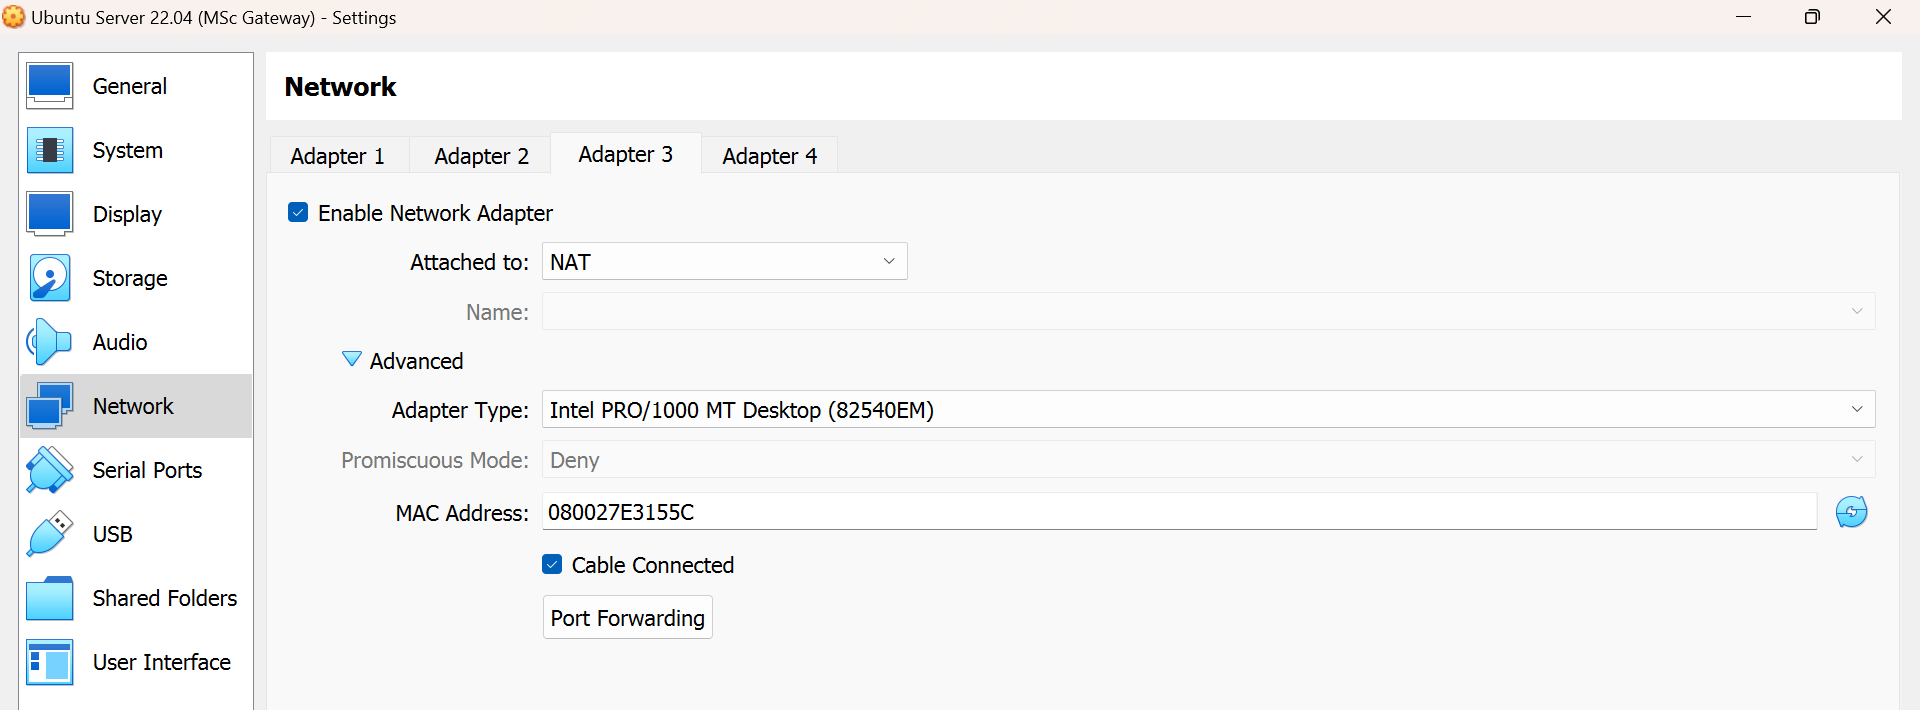
- Enable three network adapters on your Ubuntu server (Gateway)
-
configure two of the adapter to use
Internal Networkand the last one to useNATREASON: The internal networks allows private/internal access/communication while the Nat allows external (Internet) access/communication. ```
- Click on the Ubunutu Server vm
- Click on settings
- Click on Network to access and configure the network adapter as shown below.
   - Start the Ubuntu Server VM and login.
- Confirm the name of the network adapters.
- type the command ip a to display network adapter names
```
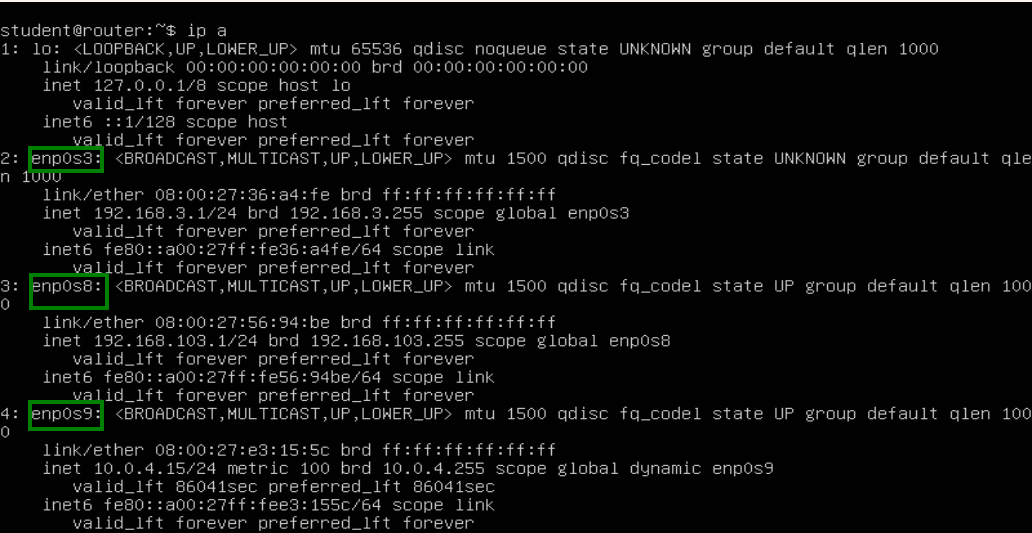
- type the command ip a to display network adapter names
```
-
Assign private IP addresses and DNS servers to your Ubuntu Server (Gateway).
Enter the below command to edit your Ubuntu Server network configuration.
sudo nano /etc/netplan/00-installer-config.yamlNOTE: You can use any name. it doesn’t have to be
"00-installer-config"COMMON ERROR HERE: Settings refusing to apply.
FIX
Enter the command
sudo nano /etc/cloud/cloud.cfg.d/99-disable-network-config.cig
Configure the file with this configuration
  network:
    config: disabled
Do a clean up.
sudo rm -f /etc/netplan/*.yaml sudo cloud-init clean sudo reboot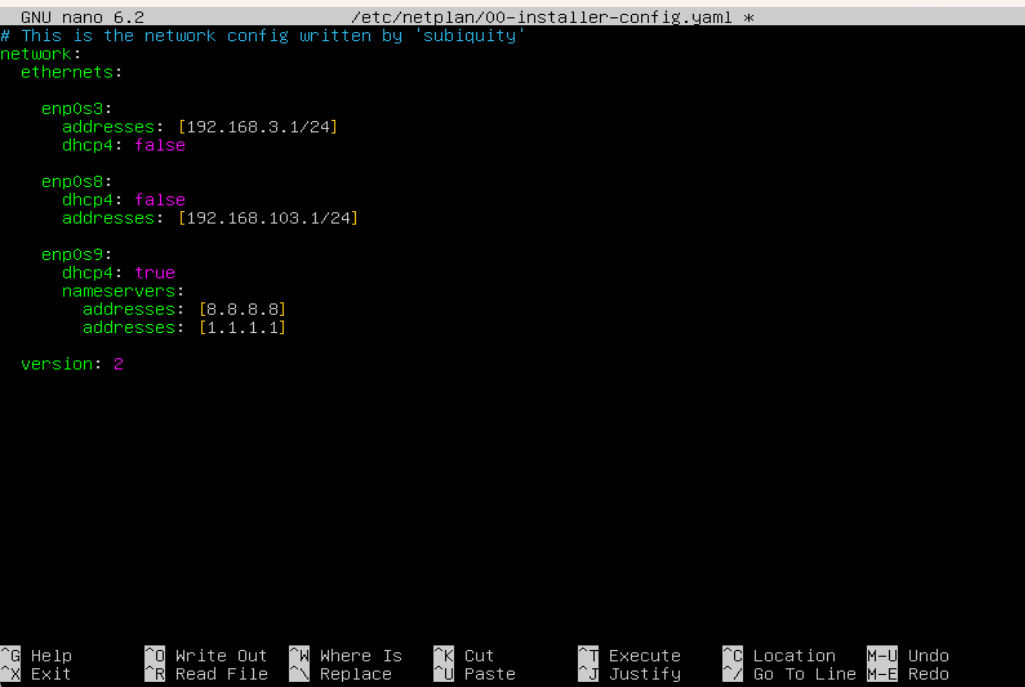 Type
Type sudo netplan applyto save changes
COMMON QUESTION
Why did we add nameservers?
We added the nameserver to the Ubuntu server configuration to ensure proper DNS resolution, enabling the server to translate domain names into their corresponding IP addresses for internet connectivity and functionality. For example if i ping google.com without the nameservers it won’t work.
COMMON MISTAKES
- Using same name for two network interfaces in the above example we used intnet and intnet1
- Forgetting to apply the changes after configuration.
- Wrong indentation while configuring the interfaces.
- Using a wrong interface name during configuration.
Troubleshooting
- Use different names for each interfaces
- Always remember to apply changes after editing.
- Follow the right indentation pattern to avoid getting errors while applying changes.
- Check the name of the interfaces before proceeding to configure the interfaces.
- use
ip ato check if the configurations where truly applied. - Ping the interfaces using ping {interface address} to see if it’s active.
 CREATING A SANDBOX NETWORK