
CREATING A FORENSIC E01 IMAGE WITH FTK IMAGER
ABOUT FTK IMAGER
STEP
Launch the FTK IMAGER application
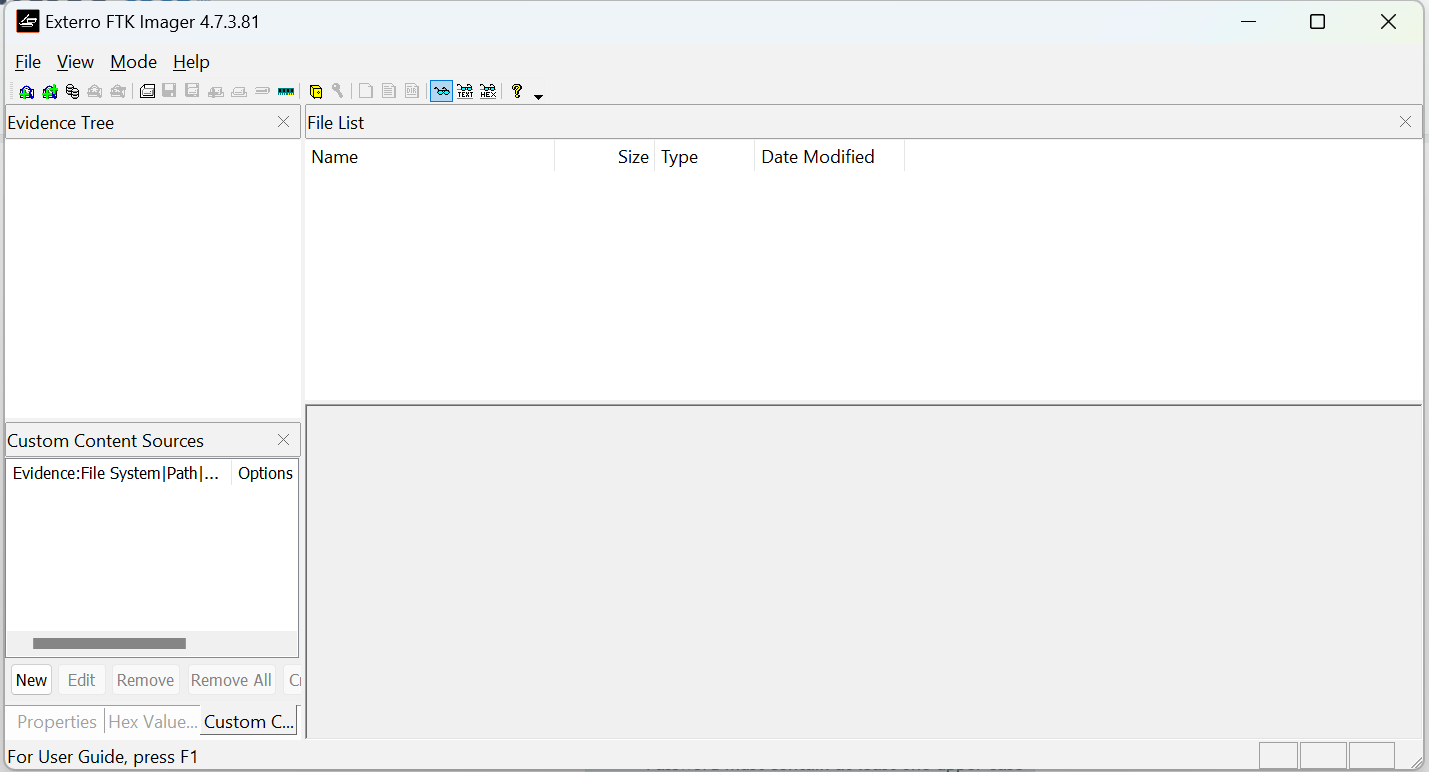
DISK IMAGE CREATION
Connect the device to be imaged
Click "File"
Click "Create Disk Image"
Select "Physical Drive"
Click "Next"
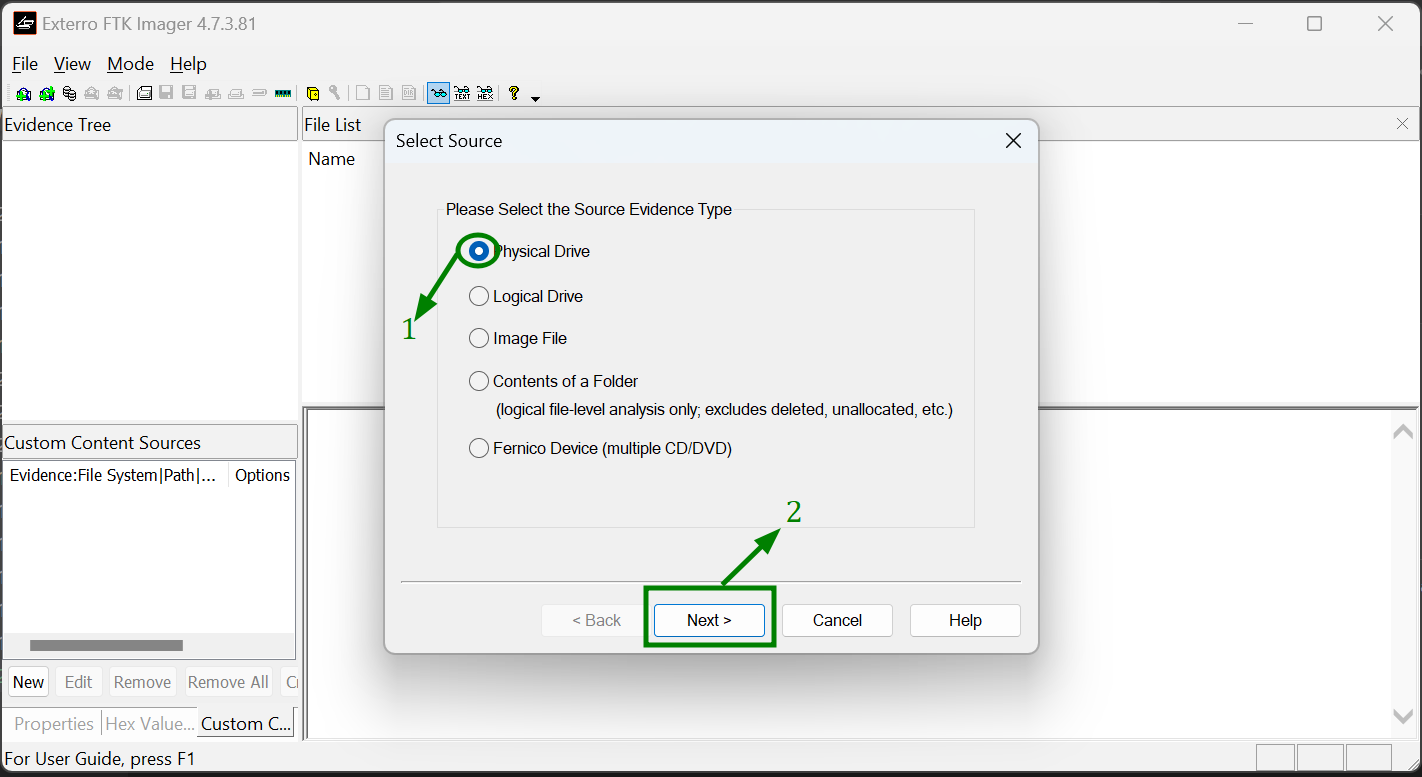
NOTE: We are selecting physical drive so we can capture the entire disk.
Select the drive that will be imaged
Click "Finish"
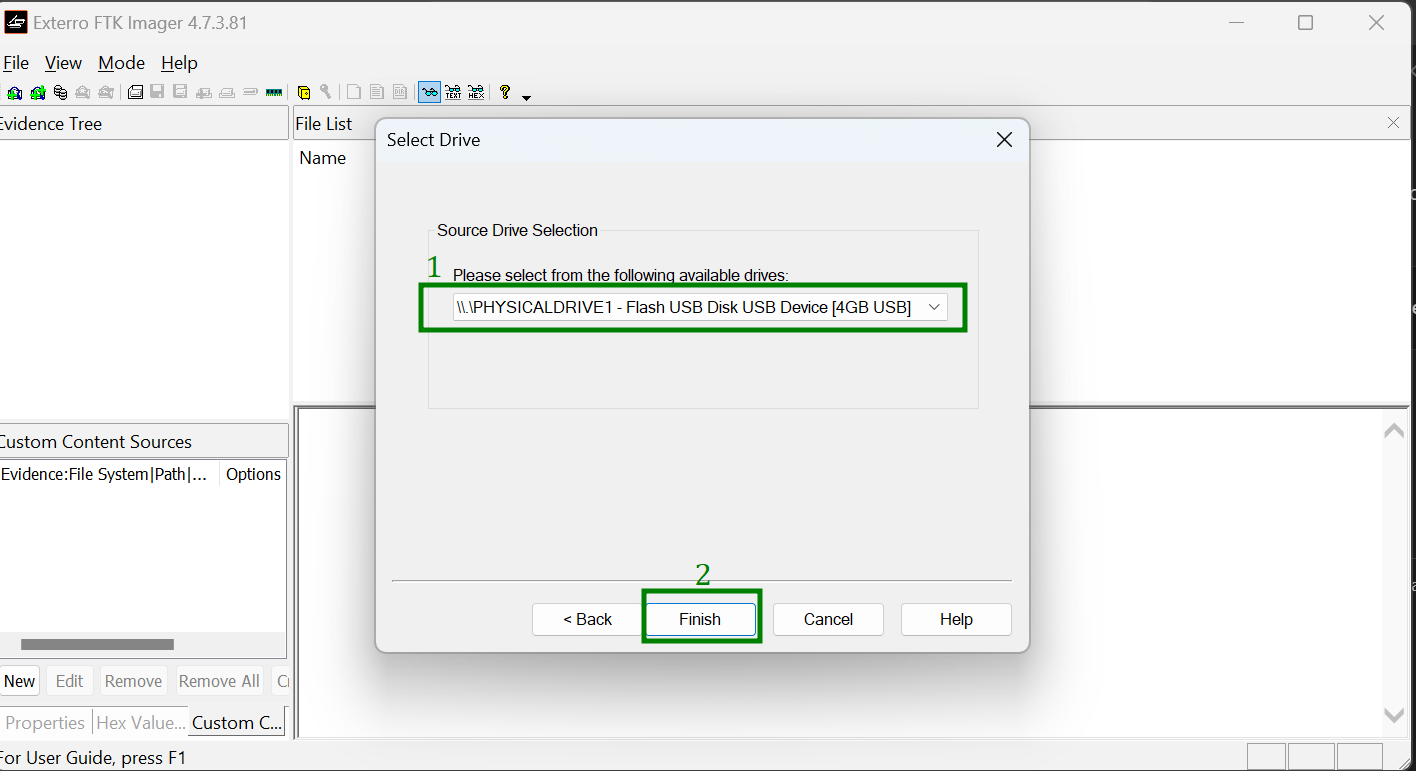
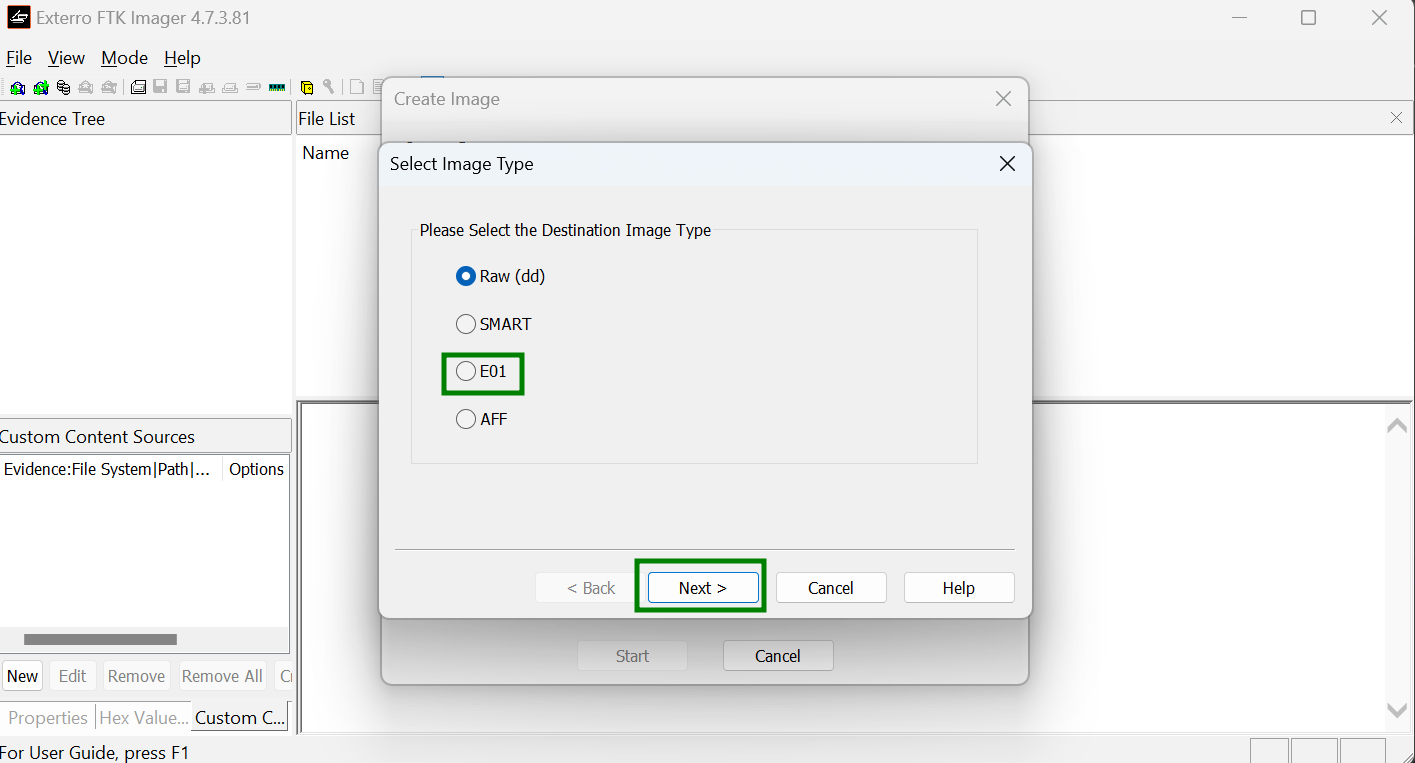
IMAGE TYPE SELECTION
NOTE: Here, we are creating E01 image
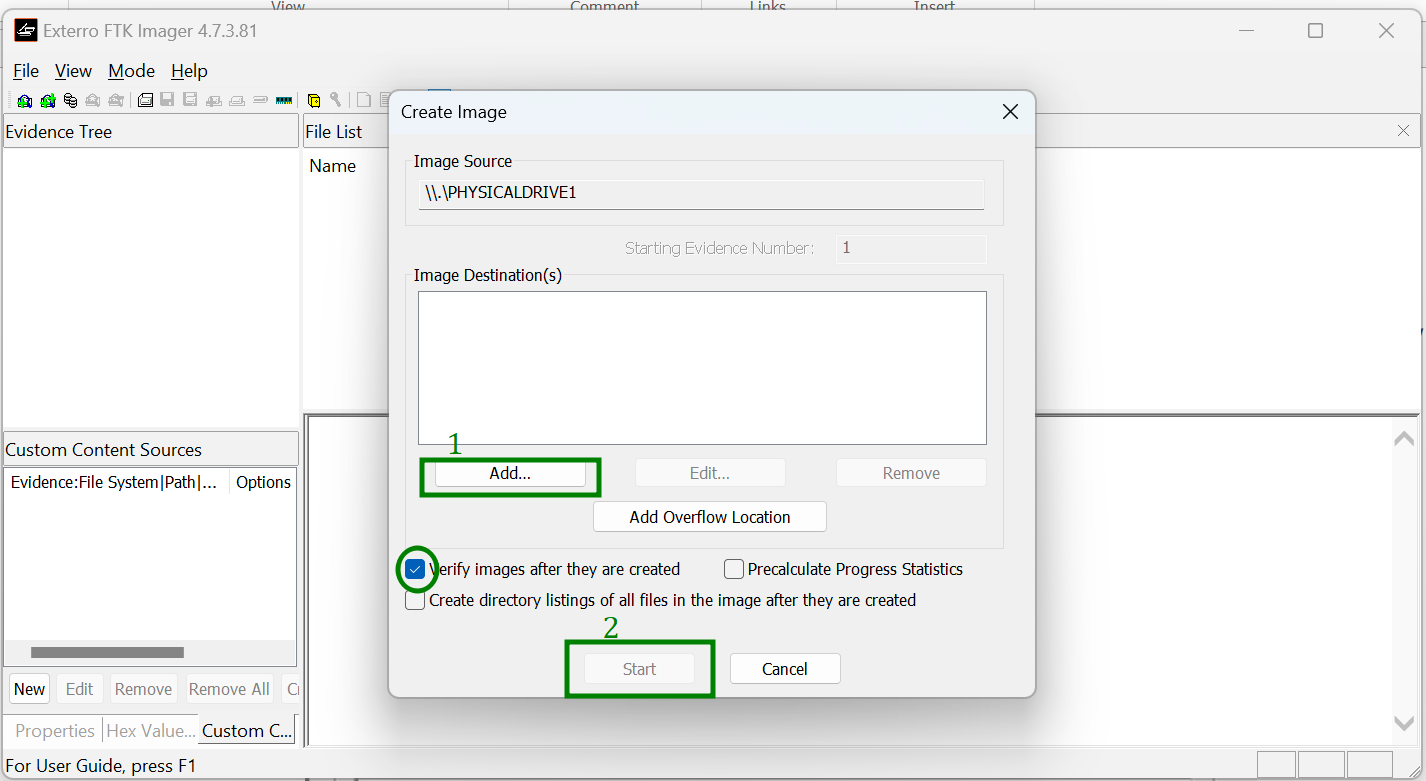
Click "Add"
Select "E01"
Click "Next"
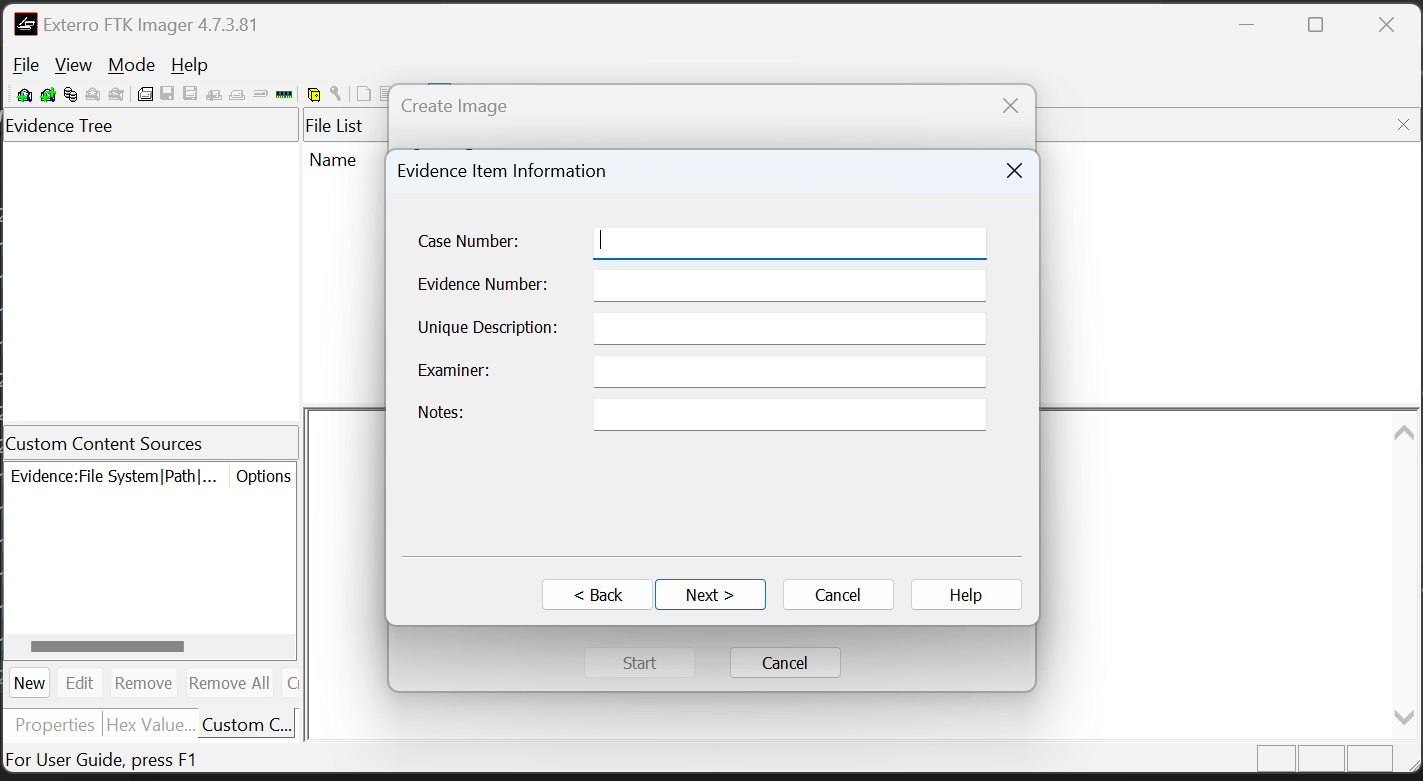
ADD INVESTIGATION DETAILS
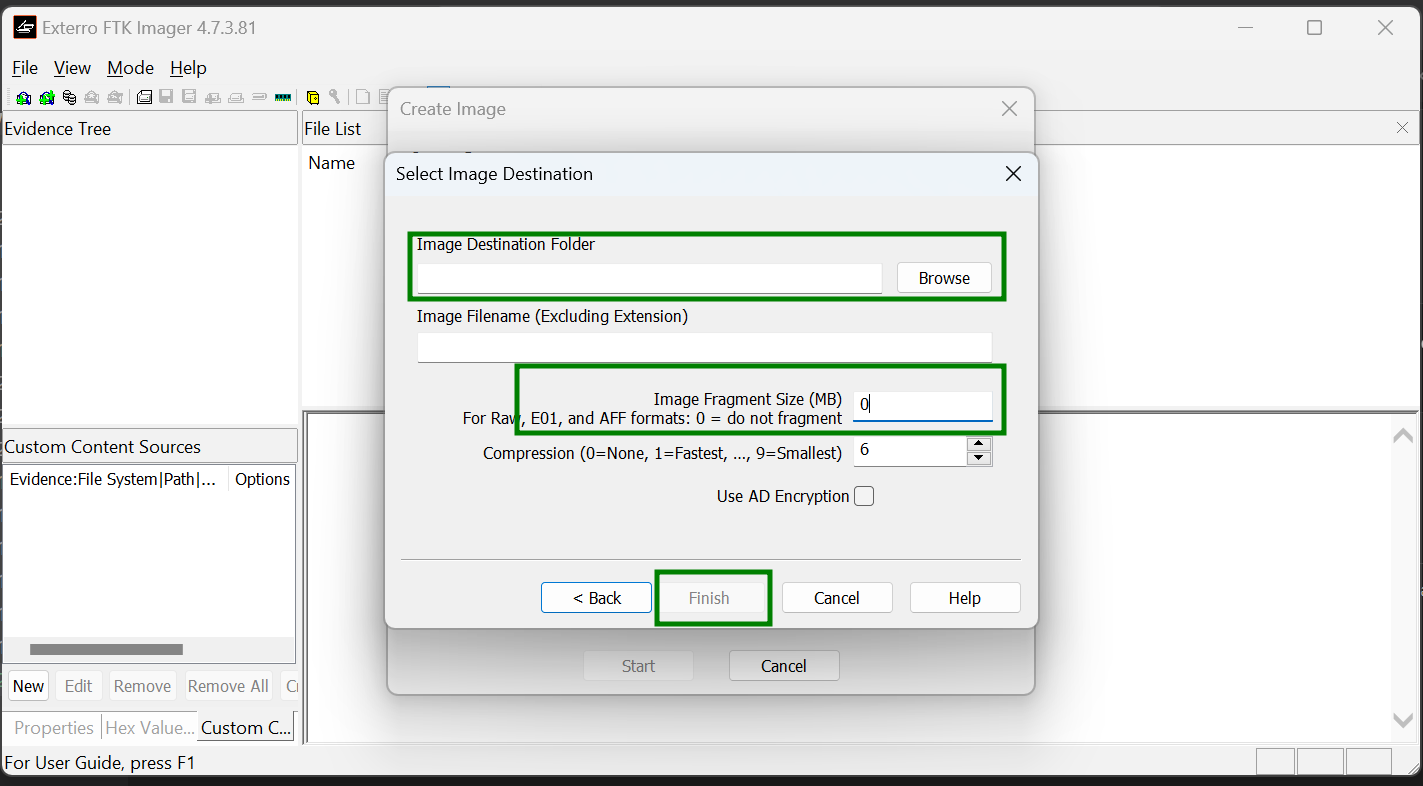
LOCATION SELECTION
Select location to save file.
Set Image Fragement Size to "0" to keep entire disk image within a single file.
Set image file name
FINALIZING
Ensure option to
- Check "verify image after they are created" is selected."
- Check "Create directory listing of all files in the image after they are created"
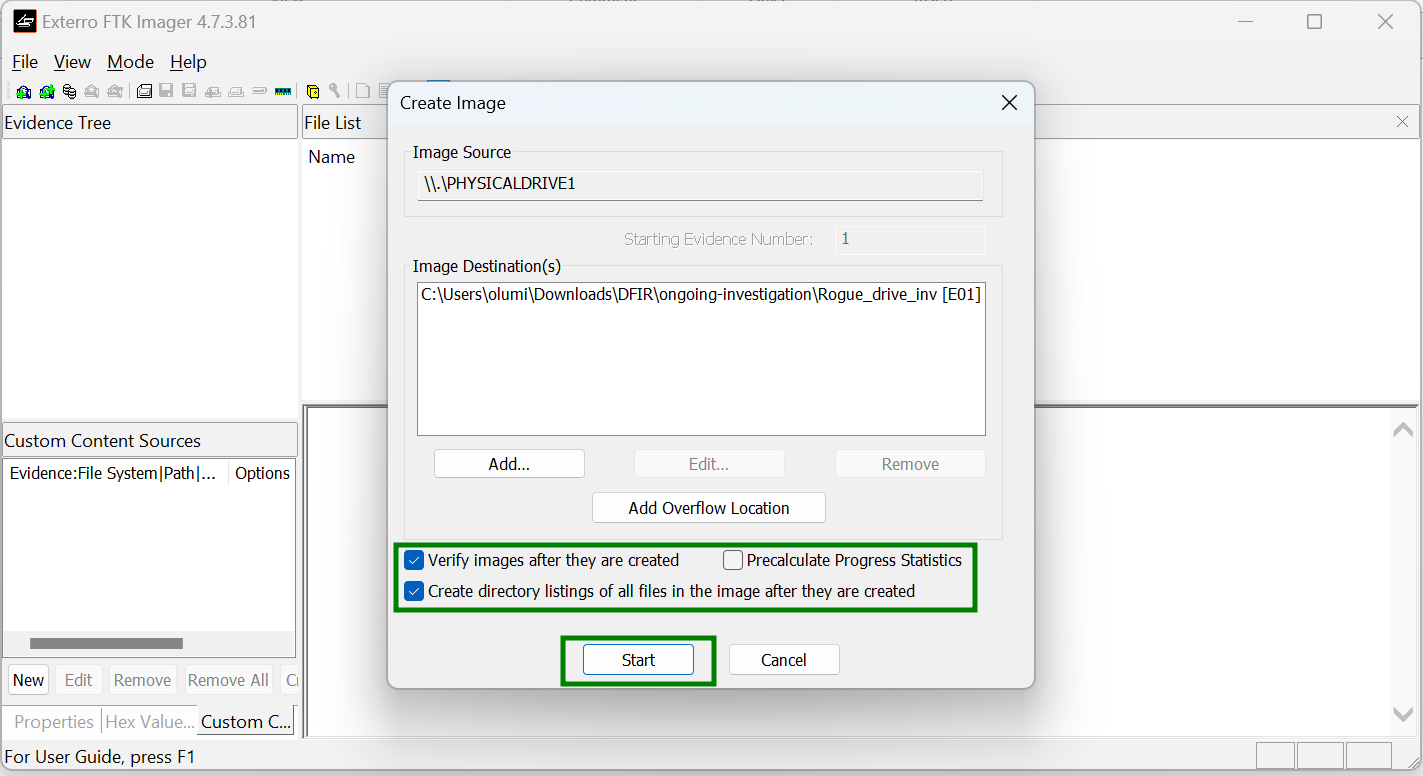 START THE CREATION
Click "Start"
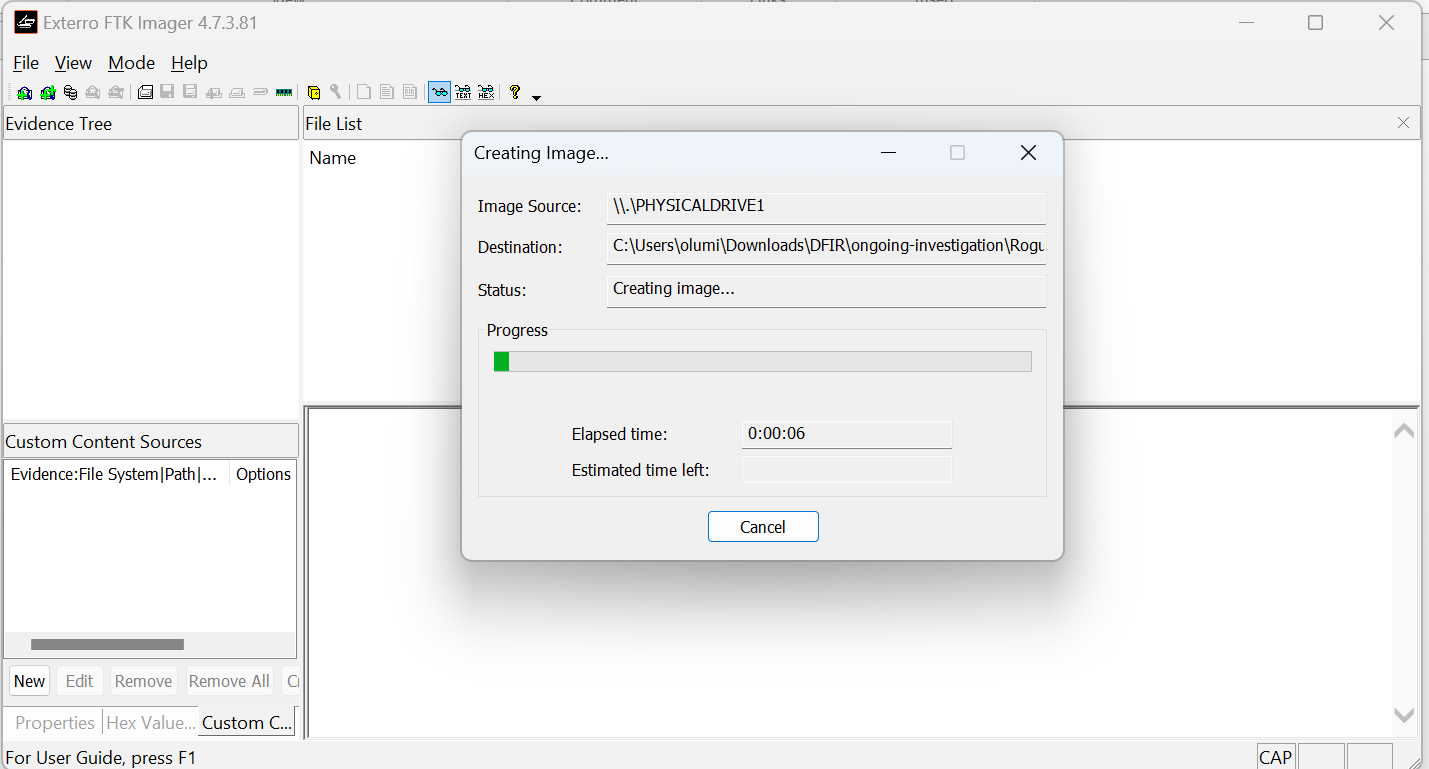
INTEGRITY VERIFICATION
Compare the hash generated. If they are not thesame, you need to repeat the processs.
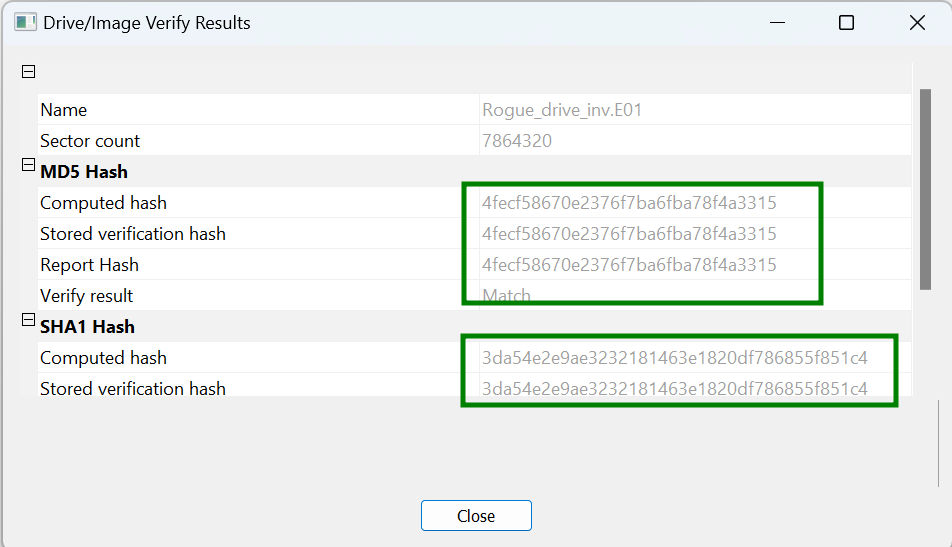
YOU CAN ALSO CLICK ON “IMAGE SUMMARY” TO SEE COMPLETE IMAGE DETAILS.
ADDING AN IMAGE TO FTK
Click "File"
Click "Add"
Select Source (Image in this case)
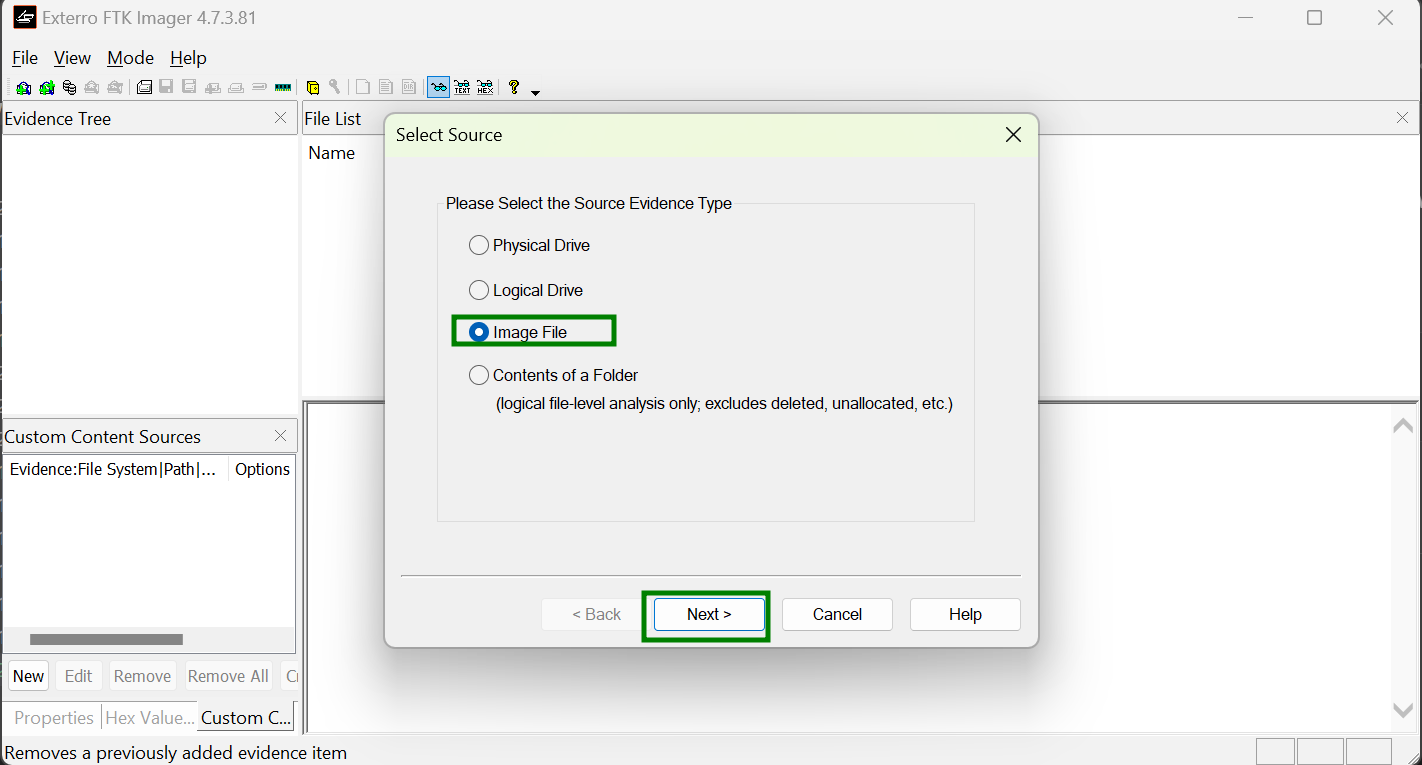
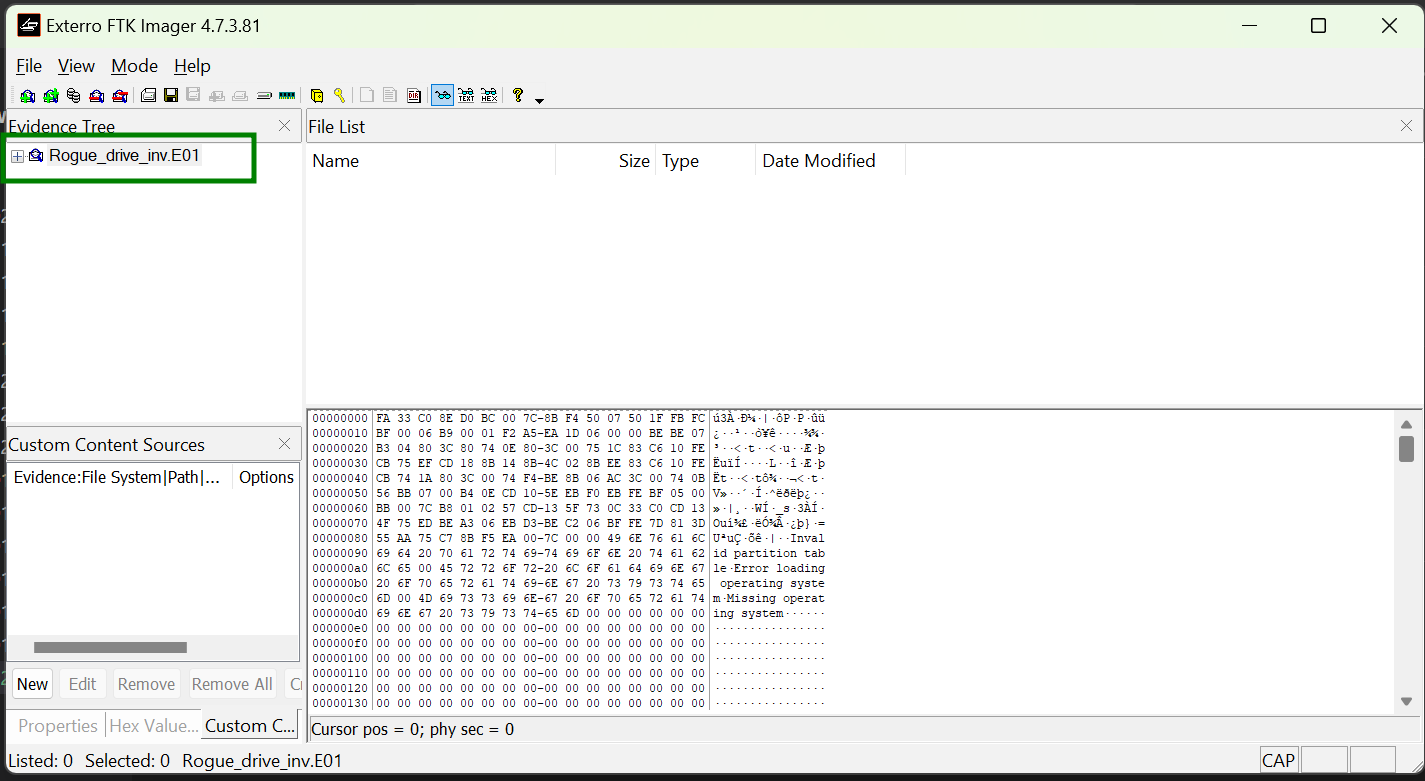
Select the image to Add
click "finish"
 Ubuntu 22.4 BUILD REVIEW USINFG CIS BENCHMARK